


 Introduction:
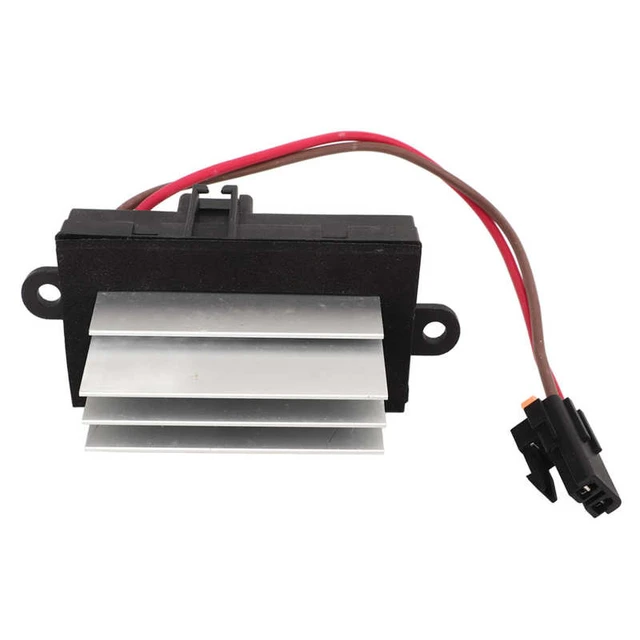
The blower motor resistor is a vital component of a vehicle’s heating, ventilation, and air conditioning (HVAC) system. When the blower motor resistor fails, it can result in issues such as a malfunctioning blower fan or inconsistent airflow. Understanding how to replace a blower motor resistor is crucial for maintaining a comfortable and functional HVAC system. In this comprehensive guide, we will explore the step-by-step process of replacing a blower motor resistor. By following these simple instructions, individuals can successfully tackle this repair and restore their vehicle’s HVAC system to optimal working condition.
 Materials used in blower motor resistors:
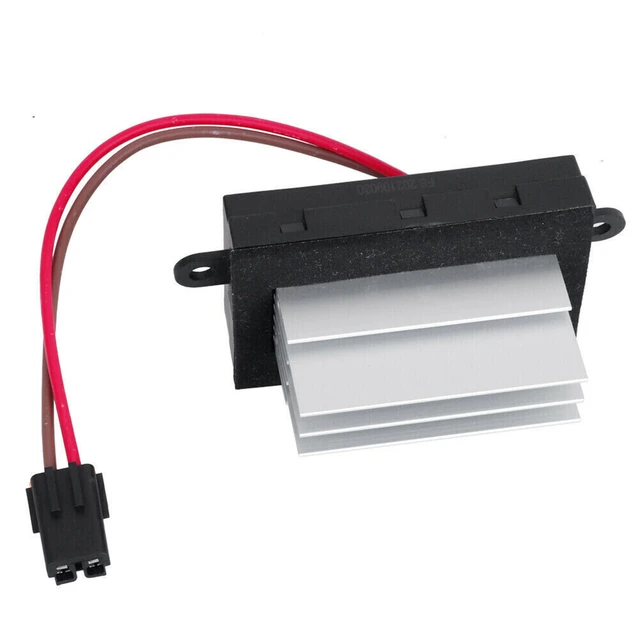
The materials used in blower motor resistors can vary depending on the specific design and manufacturing preferences, but typically include:
Ceramic Substrate: The main body of the blower motor resistor is commonly made of a ceramic material, such as aluminum oxide (Al2O3) or silicon carbide (SiC). These ceramic substrates provide excellent thermal insulation and allow for efficient dissipation of heat generated during operation.
Resistive Element: The resistive element inside the blower motor resistor is essential for controlling the current flow to the blower motor. It is usually constructed using a resistive material, such as a metal alloy or metal oxide, that exhibits a specific resistance value. Common materials used for the resistive element include nichrome (nickel-chromium alloy) or tantalum.
Conductive Contacts: The blower motor resistor has connections or contacts for electrical connections to the vehicle’s wiring harness. These contacts are typically made of conductive materials like copper or brass, which offer good electrical conductivity and durability.
Solder Connections: Various components in the blower motor resistor may be connected using solder. Solder is typically made up of a mixture of metals, such as tin and lead or other lead-free alternatives, which facilitate reliable electrical and mechanical connections.
It’s important to note that the specific materials used in blower motor resistors can vary depending on the manufacturer, vehicle brand, and regulatory requirements. Additionally, the move towards more environmentally friendly materials has led to the use of alternative materials in some blower motor resistor designs, such as lead-free solder or resistive elements with reduced heavy metal content.
 Primary functions:
The blower motor resistor plays a crucial role in the operation of a vehicle’s heating, ventilation, and air conditioning (HVAC) system. Here are its primary functions:
Motor Speed Control:
The main function of the blower motor resistor is to regulate the speed of the blower motor. It achieves this by controlling the electrical current flowing to the motor. The blower motor resistor typically has multiple resistors or resistive circuits with different levels of resistance. By adjusting the resistance, the blower motor resistor can vary the voltage supplied to the motor and, consequently, control its speed.
Blower Fan Speeds:
The blower motor resistor enables the HVAC system to provide different fan speeds or airflow rates. It usually offers multiple speed settings, such as low, medium, and high, allowing the user to select the desired level of airflow or comfort inside the vehicle. Each speed setting corresponds to a specific resistor or resistive circuit within the blower motor resistor.
Temperature Control:
By adjusting the blower motor speed, the blower motor resistor contributes to controlling the temperature inside the vehicle. When the HVAC system is set to a higher fan speed, it can help cool or warm the cabin more quickly. Conversely, lowering the fan speed can help maintain a more constant temperature and reduce energy consumption.
Energy Efficiency:
The blower motor resistor allows for energy-efficient operation of the HVAC system by providing various fan speed options. Controlling the blower motor speed helps balance the need for comfort with energy consumption, allowing the system to function optimally based on user preferences and environmental conditions.
The blower motor resistor is an essential component in HVAC systems as it enables precise control of the blower motor speed and airflow, ensuring comfortable interior conditions in different weather and environmental situations.
 Assessing the Situation
Symptoms of a Faulty Blower Motor Resistor:
Inoperative or intermittent operation of the blower fan.
Inability to adjust fan speed or only certain speeds working.
Inconsistent airflow or lack of airflow from the HVAC vents.
Determining the Blower Motor Resistor’s Location:
Locate the blower motor resistor’s position within the vehicle, which can vary depending on the make and model.
Common locations include the firewall, under the dashboard, or behind the glove compartment.
Gathering the Necessary Tools and Parts
Tools Required:
Ratchet and socket set.
Screwdrivers (flathead and Phillips).
Pliers.
Wire strippers and crimpers.
Multimeter (for testing purposes).
Safety goggles and gloves.
Replacement Blower Motor Resistor:
Acquire a new blower motor resistor that is compatible with the vehicle’s make and model.
Ensure the replacement matches the original resistor in terms of connector type and number of terminals.
Removing the Faulty Blower Motor Resistor
Disconnecting the Vehicle’s Battery:
Safely disconnect the vehicle’s battery to prevent electrical shocks and accidental activations during the repair process.
Follow proper battery disconnection procedures as outlined in the vehicle’s owner’s manual.
Locating and Removing the Old Blower Motor Resistor:
Locate the old blower motor resistor based on its predetermined location.
Remove any panels, screws, or fasteners necessary to access the blower motor resistor.
Disconnecting the Wiring Harness:
Carefully disconnect the electrical connector(s) from the blower motor resistor by pressing any release tabs or using small pliers if necessary.
Take note or mark the orientation of the connector for correct reinstallation.
Removing the Blower Motor Resistor:
Remove any screws, bolts, or clips securing the blower motor resistor to its mounting location.
Gently pull the old blower motor resistor out of the mounting location, taking care not to damage any surrounding components.
Installing the New Blower Motor Resistor
Preparing the New Blower Motor Resistor:
Compare the new blower motor resistor to the old one to ensure a proper match.
Transfer any necessary mounting hardware or connectors from the old resistor to the new one.
Mounting the New Blower Motor Resistor:
Carefully insert the new blower motor resistor into the mounting location, aligning it with any screw holes or clips.
Secure the blower motor resistor in place using the original screws, bolts, or clips.
Reconnecting the Wiring Harness:
Reconnect the electrical connector(s) to the new blower motor resistor, ensuring a secure and proper connection.
Double-check that the connector is oriented correctly based on any markings made during removal.
Testing and Finalizing the Repair
Reconnecting the Vehicle’s Battery:
Safely reconnect the vehicle’s battery according to the proper procedures outlined in the owner’s manual.
Testing the Blower Motor Resistor:
Start the vehicle’s engine and test the blower motor resistor by operating the HVAC system at different speeds.
Verify that the blower fan functions properly and that airflow is consistent at each speed setting.
Final Checks:
Confirm that all panels, screws, and fasteners are properly secured and reinstalled.
Conduct a final visual inspection to ensure no components were left loose or damaged during the repair process.
 Conclusion:
Replacing a faulty blower motor resistor is an essential repair task for maintaining proper HVAC functionality in a vehicle. By following the step-by-step instructions provided in this comprehensive guide, individuals can confidently replace a blower motor resistor and restore their vehicle’s heating and cooling system to optimal working condition. From assessing the situation and gathering the necessary tools and parts to removing the old resistor and installing the new one, every step is crucial in completing a successful repair. Embrace the knowledge shared in this guide to effectively replace a blower motor resistor and enjoy a comfortable driving experience with a fully functional HVAC system.


