 Introduction:
The blower motor resistor is a vital component in your vehicle’s heating, ventilation, and air conditioning (HVAC) system. It regulates the speed of the blower motor, allowing for adjustments in airflow. If the blower motor is not functioning properly, it may be due to a faulty resistor. In this comprehensive article, we will provide you with a step-by-step guide on how to test a blower motor resistor. By following these instructions, you can diagnose and troubleshoot potential issues with the resistor and restore efficient operation to your HVAC system.
 There are different types of blower motor resistors used in various vehicles, including:
Blower motor resistors are component used in HVAC (heating, ventilation, and air conditioning) systems in vehicles to control the speed of the blower motor. There are different types of blower motor resistors used in various vehicles, including:
Thermal Resistor:
This is the most common type of blower motor resistor. It uses a bi-metallic strip that expands or contracts with temperature changes, regulating the current to the blower motor. As the temperature increases, the resistance of the strip increases, which slows down the blower motor speed.
Solid-State Resistor:
Some vehicles use solid-state blower motor resistors, which utilize electronic components such as transistors, resistors, and capacitors to control the blower motor speed. These resistors offer more precise speed control and are more efficient than thermal resistors.
Wirewound Resistor:
Wirewound resistors consist of a metal or alloy wire wound on a ceramic core or other non-conductive material. They are used in some blower motor resistor designs, providing precise resistance values and good heat dissipation.
The specific type of blower motor resistor used in a vehicle depends on the vehicle’s make, model, and year, as well as the HVAC system design. Manufacturers may incorporate different resistor types to achieve desired performance and compatibility with their HVAC systems.
It’s important to note that newer vehicles may be equipped with more advanced electronic control modules (ECMs) that handle blower motor speed control without a separate blower motor resistor. In these cases, the ECM uses pulse width modulation (PWM) technology to adjust the motor speed directly.
Safety Precautions
Ensure Vehicle Safety:
Park your vehicle on a flat surface and engage the parking brake.
Disconnect the negative terminal of the battery to prevent electrical shocks.
Accessing the Blower Motor Resistor
Locate the Resistor:
Consult your vehicle’s manual or conduct online research to determine the location of the blower motor resistor.
Common locations include under the dashboard, behind the glove compartment, or near the blower motor itself.
Remove Necessary Components:
As needed, remove panels or covers that obstruct access to the blower motor resistor using appropriate tools.
Take caution not to damage any surrounding components during removal.
 Testing the Blower Motor Resistor
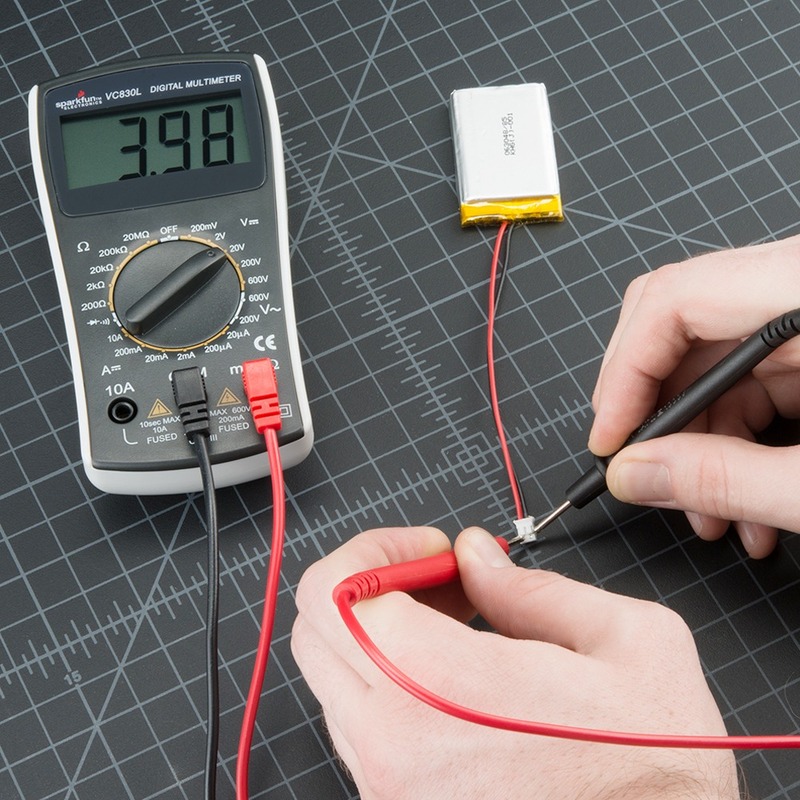
Prepare a Multimeter:
Set your multimeter to the resistance (ohms) setting.
Identify the Resistor Terminals:
Examine the blower motor resistor for terminal markings such as “C” (common), “H” (high), “M” (medium), and “L” (low).
In some cases, resistors may have different labeling schemes, so consult your vehicle’s manual or a wiring diagram for clarification.
Test Resistance:
Place one multimeter probe on the common terminal (“C”) and the other probe on each of the remaining terminals (“H,” “M,” and “L”) one at a time.
Record the resistance value displayed on the multimeter for each terminal.
Compare Results:
Compare the resistance values obtained with the specifications provided in your vehicle’s manual.
If the resistance readings significantly deviate from the specified values, the blower motor resistor may be faulty.
 Additional Considerations
Visual Inspection:
While testing the resistor, visually inspect it for any visible signs of damage, such as burns, corrosion, or melted components.
If apparent damage is observed, it is likely the resistor is defective and needs to be replaced.
External Connections:
Check the wires and connections leading to and from the blower motor resistor for any signs of damage, fraying, or loose connections.
If issues are identified, repair or replace affected components as necessary.
Reinstalling Components
Reinstalling Resistor and Components:
Once testing is complete, reinstall the blower motor resistor in its original position.
Ensure all panels, covers, and connectors removed during the testing process are securely reattached.
Professional Assistance
Consult a Mechanic:
If you encounter difficulties during the testing process or are unsure of the results, consult a qualified mechanic for further evaluation and assistance.
They can provide expert guidance and perform more advanced diagnostic tests if needed.
Some tips to help maintain and prolong the lifespan of your blower motor resistor:
The blower motor resistor is a crucial component in your vehicle’s HVAC system. While it generally requires minimal maintenance, here are some tips to help maintain and prolong the lifespan of your blower motor resistor:
Keep the HVAC System Clean:
Regularly clean and replace the cabin air filter as recommended by the vehicle manufacturer. A clean air filter ensures better airflow and helps prevent debris from entering the blower motor resistor and causing damage.
Avoid Overworking the HVAC System:
Excessive strain on the blower motor can lead to increased stress on the blower motor resistor. Avoid running the HVAC system at maximum speed for prolonged periods or setting the blower motor speed too high. Use the system at comfortable levels to prevent excessive heat buildup.
Check for Signs of Failure:
Look out for warning signs of a failing blower motor resistor, such as inconsistent or total loss of blower motor speeds, unusual noises from the HVAC system, or an incorrect display on the HVAC control unit. If you notice any issues, have the blower motor resistor inspected and replaced if necessary.
Regularly Inspect and Clean Connections:
Over time, dirt, corrosion, or loose connections can affect the performance of the blower motor resistor. Periodically inspect the electrical connections leading to the resistor and clean them if necessary. Ensure the connections are secure and tight.
Protect from Moisture:
Moisture can corrode the electrical connections and components of the blower motor resistor. To protect it, avoid water exposure in the engine compartment and ensure that any leaks, such as HVAC system drain tubes, are properly maintained and repaired.
Follow Manufacturer’s Maintenance Recommendations:
Refer to your vehicle’s owner’s manual or consult the manufacturer’s recommendations for specific maintenance guidelines. Follow any recommended maintenance schedules or procedures for the HVAC system to keep the blower motor resistor in good condition.
If your blower motor resistor malfunctions, it is recommended to have it diagnosed and repaired by a qualified technician. They can provide expert advice, perform necessary repairs or replacements, and ensure the HVAC system functions properly.
Remember, proper maintenance and timely repairs are crucial to ensuring the functionality and reliability of the blower motor resistor and the overall performance of your vehicle’s HVAC system.
 Conclusion:
Testing a blower motor resistor is a straightforward process that can help you identify potential issues with your vehicle’s HVAC system. By following the step-by-step guide outlined in this article, you can diagnose problems, such as a faulty resistor, and take appropriate measures to resolve them. Remember to prioritize safety precautions, access the resistor, test the resistance using a multimeter, and compare results with manufacturer specifications. If needed, consult a professional mechanic for assistance. By accurately diagnosing and addressing issues with the blower motor resistor, you can restore proper functionality to your vehicle’s HVAC system and ensure optimal comfort during your journeys.


